
Signs & displays
How to choose the right material for your sign
Compare coroplast, foam board, PVC, aluminum composite, vinyl banners and window graphics by location, handling and installation.
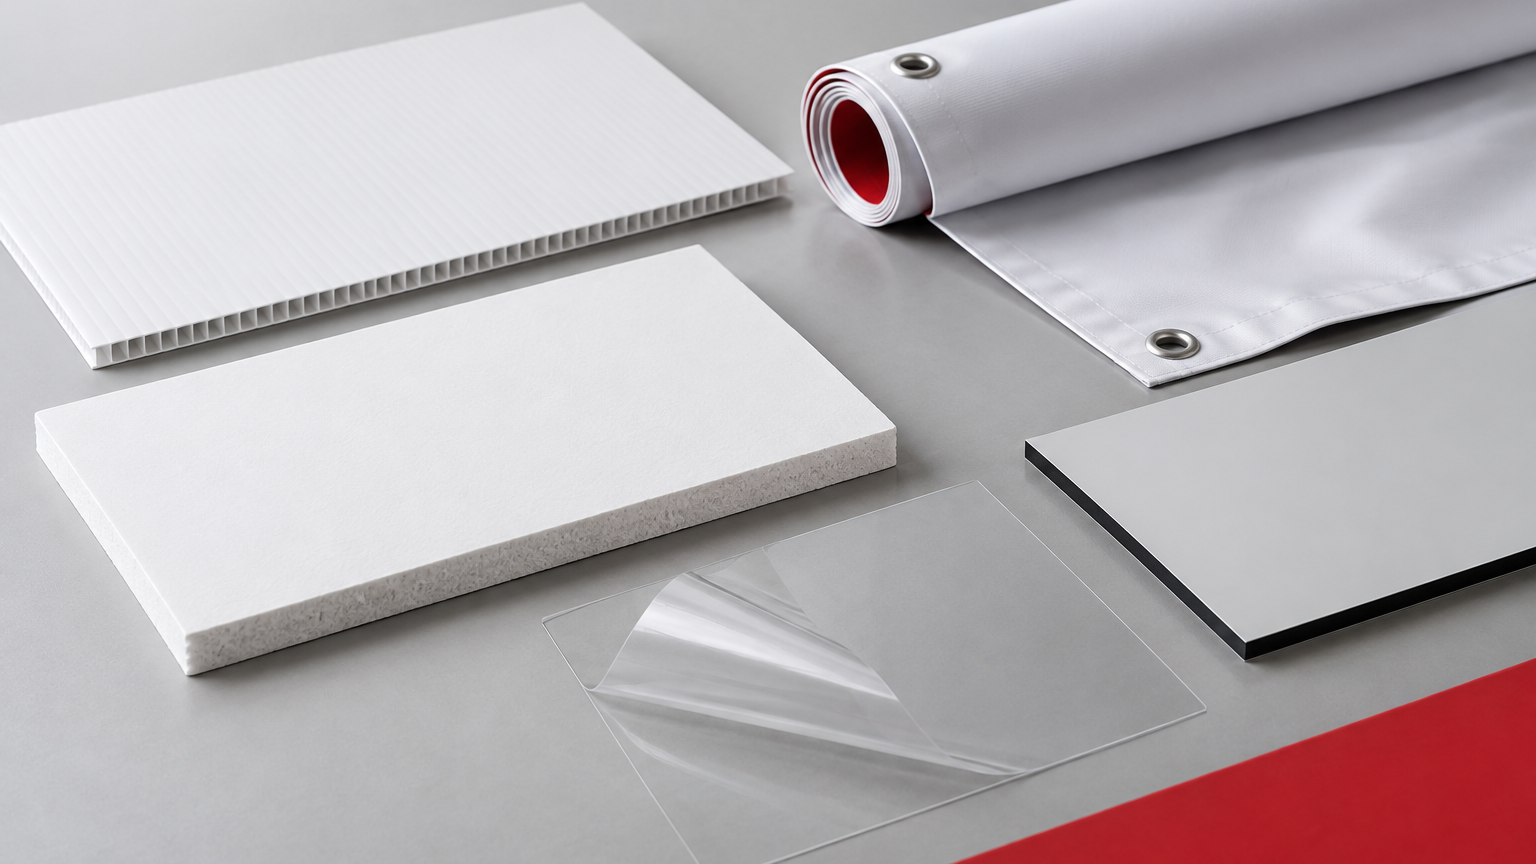
The right sign material depends less on the artwork than on where the sign will live, how it will be mounted and how often it will be moved. A rigid outdoor panel, a lobby presentation board and a banner for recurring events may carry the same message but need very different substrates.
Before choosing a material, define the viewing distance, exposure, mounting method, finished size and expected handling. Then confirm the current product specifications for the exact sign you plan to order.
01
Start with the environment and the job
First decide whether the sign will be indoors, outdoors or in a sheltered transition space. Consider moisture, direct sun, temperature changes, wind, cleaning and contact with customers or staff.
- Indoor display: prioritize surface quality, edge appearance, weight and compatibility with the stand or wall system.
- Temporary outdoor use: prioritize light weight, weather resistance and a secure mounting plan.
- Longer-term exterior use: prioritize rigidity, dimensional stability, suitable hardware and safe professional installation.
- Frequently transported sign: consider flexibility, packed size, edge protection and how quickly it can be installed.
- Window application: confirm whether the graphic is viewed from inside, outside or both, and whether removal or privacy matters.
02
Compare the common sign materials
Each material solves a different problem. Avoid choosing only by price or thickness; the cheapest panel can become expensive if it bends, looks unfinished in the space or cannot be mounted safely.
- Corrugated plastic: lightweight, economical and easy to handle. Often used for yard signs, directional signs and short campaigns.
- Foam board: very light with a smooth printable face. Best protected indoors for presentations, retail displays and mounted posters.
- Rigid PVC: smooth, clean-edged and more substantial than foam board. Useful for indoor signs and sheltered applications where a refined panel is wanted.
- Aluminum composite: a rigid panel with metal faces and a lightweight core. Common for exterior building, parking and property signage when paired with appropriate finishing and hardware.
- Vinyl banner: flexible, rollable and practical for events, fences and temporary large-format messages. Hemming, grommets and installation tension affect the result.
- Window film or decal: designed for glass, with options for clear, opaque, perforated or privacy-oriented applications. Surface preparation and viewing direction are essential.
03
Plan the installation before the artwork
Installation affects material, size and finishing. A panel can be taped, screwed, framed, suspended, staked or placed in hardware; a banner may need grommets, pole pockets or a compatible stand.
- Confirm the mounting surface and who is responsible for installation.
- Measure the available area, obstructions and sight lines rather than relying on an estimate.
- Identify holes, grommets, stakes, frames, adhesives or stands before approving the layout.
- Keep important content clear of hardware, folds, seams and panel edges.
- For public, elevated or wind-exposed installations, use qualified advice and suitable hardware.
04
Design for the real viewing distance
A sign should communicate in the few seconds available to the viewer. The farther away or faster people pass, the shorter the message and the larger the type must be.
- Lead with one message, not a paragraph.
- Use strong contrast between text and background.
- Keep logos and essential details away from trim and mounting areas.
- Test QR codes at the final printed size and expected scanning distance.
- Print a reduced proof, place it across the room and check whether the hierarchy is still clear.
05
Confirm the complete specification
Material is only one part of the order. Confirm finished size, print sides, shape, finishing, hardware, installation, quantity, file requirements and delivery destination together.
- Check whether the material edges will remain visible in the final setting.
- Confirm one-sided or two-sided printing and whether both sides need different artwork.
- Review white ink, opacity or backlighting requirements for clear and translucent materials.
- Ask how the sign should be packed if it will travel or be stored between uses.
- Keep the approved artwork and final specification together for future reorders.
Sign-material decision checklist
- Indoor, outdoor or sheltered location confirmed
- Viewing distance and finished size measured
- Expected handling and storage considered
- Mounting method and hardware selected
- Wind, moisture and sun exposure reviewed
- Print sides, finishing and edge appearance confirmed
- Artwork checked at the final size
- Installation responsibility confirmed